Searching for "drywall repair near me" usually means one of two things: you're staring at a crack, dent, or water stain wondering if you can handle it yourself, or you already tried a DIY fix and it's not holding up the way you expected. Both situations are extremely common, and the good news is that most drywall problems are fixable. The issue is that a lot of well-intentioned repairs go wrong in the same handful of ways, and those mistakes usually don't show up until the paint goes on.
Here's a look at the most common drywall repair mistakes homeowners make, and what actually needs to happen instead.
Mistake #1: Skipping Primer on the Patch
This is probably the single most common mistake, and it's an easy one to make since it seems harmless. Once a patch is sanded smooth, it's tempting to just paint right over it along with the rest of the wall. The problem is that joint compound absorbs paint differently than the surrounding drywall. Left unprimed, that patch often shows up later as a slightly duller or shinier spot once the paint fully dries, an effect sometimes called flashing. It's subtle at first, but it becomes obvious under certain lighting, especially with satin or semi-gloss finishes.
The fix is simple: prime every patched area separately before the topcoat goes on, even if it feels like an unnecessary extra step. It's one of the easiest ways to avoid a repair that quietly reappears weeks after the project is finished.
Mistake #2: Applying Joint Compound Too Thick, Too Fast
Trying to fill a hole or crack in one thick layer feels efficient, but it almost always backfires. Thick applications take much longer to dry all the way through, and they're far more likely to crack as they cure, especially in larger repairs. What looks finished after a few hours can still be soft or unstable underneath.
Professional drywall repair and painting in Naperville typically involves applying compound in thin layers, letting each one dry fully, usually a full day for larger repairs, before adding the next. It takes more patience, but it's the difference between a patch that lasts and one that needs to be redone within a year.
Mistake #3: Not Sanding Enough (Or Sanding Unevenly)
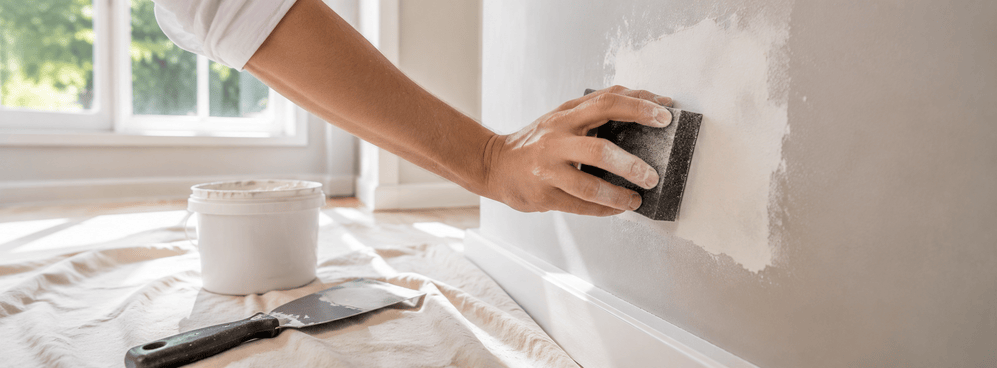
A patch that feels smooth to the touch can still be uneven enough to show through paint, especially in rooms with strong natural light or an angle where light rakes across the wall. This is one of the reasons professional repairs often get checked with a flashlight held parallel to the surface. That raking light technique reveals bumps and dips that are invisible under normal room lighting but become obvious the moment the sun hits the wall at the wrong angle.
Getting this step right usually takes a few rounds of light sanding rather than one aggressive pass, blending the patch gradually into the surrounding wall texture instead of leaving a slightly raised or sunken edge.
Mistake #4: Ignoring the Cause of the Damage
A crack or stain is a symptom, not the actual problem. Painting over a water stain without identifying and fixing the source of the moisture is one of the most common ways a repair fails almost immediately, since the stain simply bleeds through again once the area gets damp. Similarly, a widening or diagonal crack can point to settling or a structural issue that a cosmetic patch won't resolve.
Before any repair begins, it's worth taking a moment to ask why the damage happened in the first place. Small, straight hairline cracks near doors and windows are usually just normal seasonal movement, but larger or recurring issues deserve a closer look before they're simply covered up.
Mistake #5: Using the Wrong Type of Patch for the Size of the Repair
A small nail hole and a fist-sized hole in drywall are not the same repair, but a lot of DIY attempts treat them that way. Tiny holes can usually be filled directly with spackle. Larger holes typically need a patch of actual drywall or a mesh patch to give the compound something to bond to, since compound alone can't span a large gap without cracking.
Using the wrong approach for the size of the damage is one of the fastest ways to end up with a patch that looks fine for a few weeks and then starts to sag, crack, or fall out entirely.
Mistake #6: Rushing the Timeline
Drywall repair simply takes time to do correctly. Between drying time for each coat of compound, sanding, and priming, a proper repair on anything beyond a small nail pop usually needs at least a day or two before it's ready for paint. Homeowners in a hurry to finish a room often skip ahead, and that's almost always where visible flaws end up coming from.
If you're planning a full room repaint and know there's drywall work involved, it's worth building that extra time into your overall project schedule rather than assuming it can happen the same day as painting.
How These Repairs Should Actually Be Handled
A proper drywall repair, regardless of size, generally follows the same core process. Loose or damaged material gets removed first, since patching over something unstable never holds up. Compound goes on in thin layers with drying time in between, followed by sanding until the surface is genuinely flush with the surrounding wall. The repaired area gets primed separately, and only then does it get painted along with the rest of the room. Skipping any single step in that sequence is usually where things start to go wrong.
If you're dealing with more than a couple of small nail pops, or you're not confident matching the existing wall texture, it's often worth having it looked at by someone who handles this regularly rather than risking a redo. If you want a deeper look at why this step matters so much before repainting, this guide on when to fix drywall before you paint covers the full picture of how prep quality affects your finished results.
What to Look for Before You Repaint
Before scheduling any painting project, it's worth walking through your rooms and checking for a few common warning signs: small bumps or cracks near ceiling corners, any soft or discolored spots that might indicate past moisture, and old patch jobs that were never quite sanded flush. Catching these early means they can be properly addressed as part of your painting project instead of becoming a separate, more expensive fix later on.
Getting It Fixed the Right Way
Drywall repair isn't complicated, but it does require patience and the right process to actually last. Skipping steps to save time almost always costs more time in the end, whether that's a patch that needs to be redone or a paint job that shows flaws within a few months of being finished.
If you're dealing with cracks, dents, water stains, or old patches that never quite disappeared, ProVision Painting's drywall repair services handle the full process from assessment through final paint, so the fix actually holds up long after the crew leaves. Reach out today for a free estimate and get your walls properly repaired and ready for a finish that lasts.